


Tie-dyeing isn’t just a nostalgic pastime, it’s a reminder to be bold, eccentric, daring and unabashedly creative!
You have to admit, there are very few things in life that bring back the same level of glorious childhood fun and nostalgia like tie-dyeing. As kids we fearlessly threw ourselves into our creativity, allowing our imaginations to run wild…
From finger painting to puppet making and ecstatic sandcastles building, everything we did truly showcased vivid storytelling. And it’s a state of being that I am ready to go back to as I help you all rediscover how you once played, explored and expressed yourself through things that you once created with your hands.
And so, let this blog be the gentle nudge you need to return to your childhood untamed creativity and reconnect with the Land. And to help you begin on this wholesome journey, we are starting with an activity that I just know that 8-year-old you would absolutely shriek over: tie-dyeing socks!
Quite frankly, your socks deserve a new lease on life, and honestly, so do you!
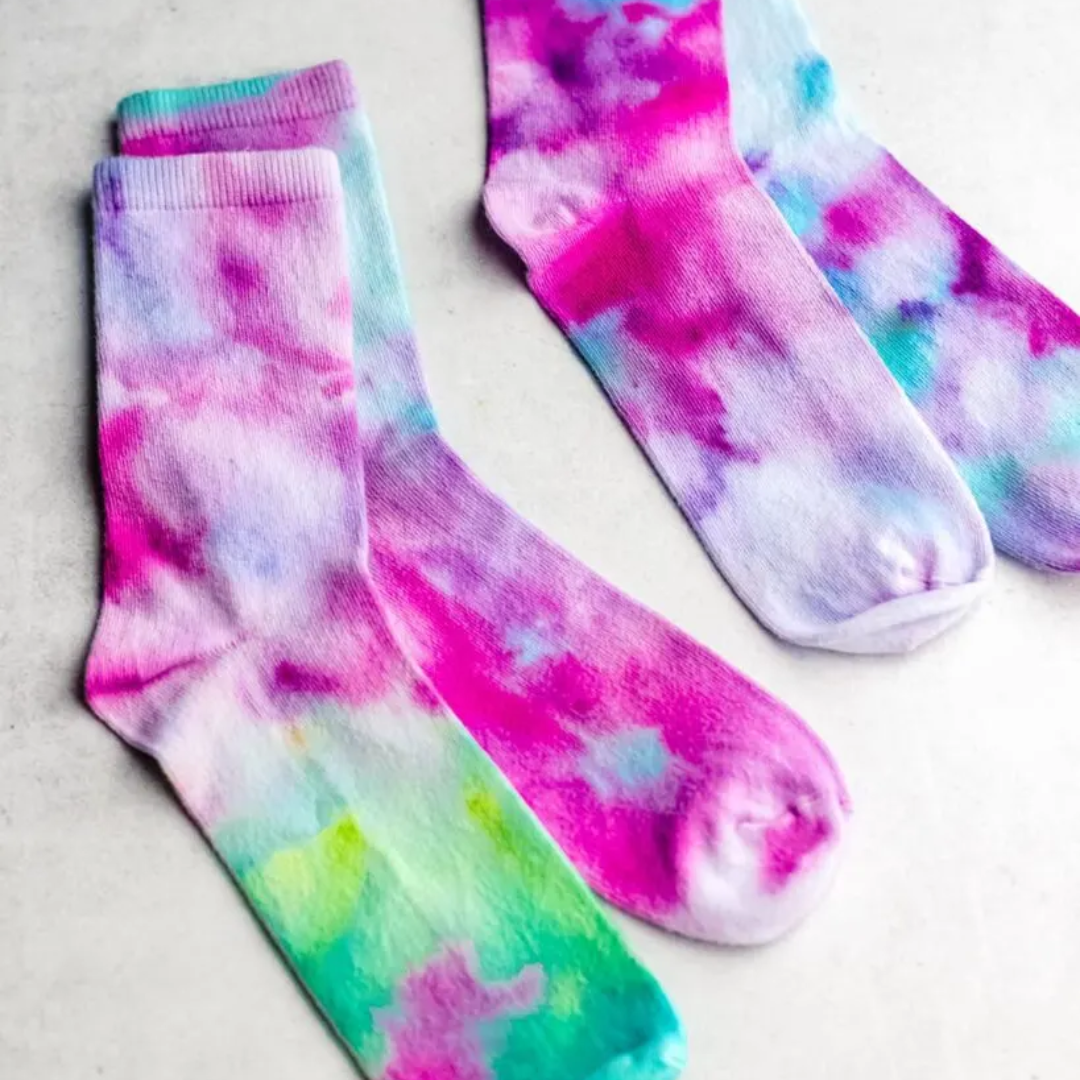
Tie-dyeing your socks
If you are looking to merely dip your toe back into the world of tie-dyeing rather than jumping in headfirst, then dyeing your old socks is a great place to start. You’ll love the theatre of it all and the vivid dramatics of this dyeing process – all without having to commit to creating a huge project. Now that’s a win-win!
Better yet, you will be happy to know that the tie-dyeing process is as easy as you remember it to be. It’s all about simplicity!
Step 1: Prep your socks
Before you can begin exploring vivid colours and inspiring tie-dye patterns, you will have to first pre-wash and mordant your socks. Gently wash them in pH-neutral washing powder to help remove any excess oils, additives or dirt – as they will impact your final product.
Once that’s done, you will then need to mordant your socks.
Now, there is no need to be intimidated by this word – it simply means helping whatever natural dye you use stick to the fibres of your socks. This means you’ll end up with socks that are as gloriously vibrant as you are!
To learn more about the mordanting process you can check out my most recent blog on it. Alternatively, I encourage you to join our online natural dyeing workshop, where we fully explore this process in its entirety.
Step 2: Prepare your dyestuff
Do you remember how earlier I mentioned how as children we had this yielding imagination? Well, this step is where you lean into that empowering creativity. Mother Nature has so many incredible natural dyestuff materials for you to play with.
From the coffee in your mug to the blossom sprouting in your garden, you just have to embrace a moment of pause to recognise them. So, before you continue reading this blog, pause and take a look around your room and notice all of the incredible things that could contribute to your tie-dyeing adventure.
Tie-dyeing with coffee
Turns out that coffee doesn’t just taste amazing, it looks amazing too when used as your natural dye. Never mind the fact that it smells absolutely delicious too!
Extracting that glorious tan, beige colour from your coffee is as simple as placing your coffee grounds in a pot, covering it with water and allowing it to simmer for an hour. Once the coffee has cooled down, you can strain it with a sieve, and voila, you have your natural coffee dye ready to go!

Tie-dyeing with flowers
In order to extract those lovely colours from your favourite flowers, you will need to bring them to a gentle simmer and allow their natural hues to fuse with the water. Keep in mind that the longer you soak the flowers, the deeper and richer the colours will be! Once that is complete, you can strain your dye and revel in the fact that you just created a homemade natural dye from flowers.
Step 3: Begin folding your fabric
While folding laundry may not be much fun, trust me when I say that folding your fabric into cool and intriguing patterns definitely is! I have written an entire blog on unique tie-dyeing folds that you can recreate. Definitely make sure to check it out – there are some really fun and quirky designs that I think you’ll love.
Step 4: Get to dyeing!
All you have to do now is place your folded wet sock into a pot that’s filled with your natural dye and allow it to simmer for at least an hour. You will slowly start to notice how your fabric begins to infuse and take on the glorious colour of your dye.
Step 5: Rinse and enjoy!
Once you’ve made it here just know that you have finally reached the last step in your tie-dyeing journey.
Simply remove your socks from the dye pot, rinse them under cold running water and then hang them to dry in a shady spot. And then you’re all done!
Train your hands to accomplish amazing feats alongside my colourful community
If there’s one thing you should know about me, it is that this is very much a sacred place of community, grounding and re-connection with both ourselves and Mother Nature. I wholeheartedly encourage you to embrace the playfulness and spontaneity of natural dyeing by joining my online natural dyeing workshop.
I hope to see you there!


