


If you are anything like me, you are one of Mother Nature’s most enthusiastic students.
From dyeing fabrics with onion skins to exploring Shibori dyeing and the distinctive hues of certain flowers, dyeing fabrics is one of the most magical and rewarding adventures. And I love how Mother Nature is always ready to teach me about these humbling practices. So much so that she has even helped me create my very own personalised, handmade wardrobe of clothes.
And while I continue to learn from the Land, I recently discovered yet another fun and instructive textile technique: ice-dyeing.
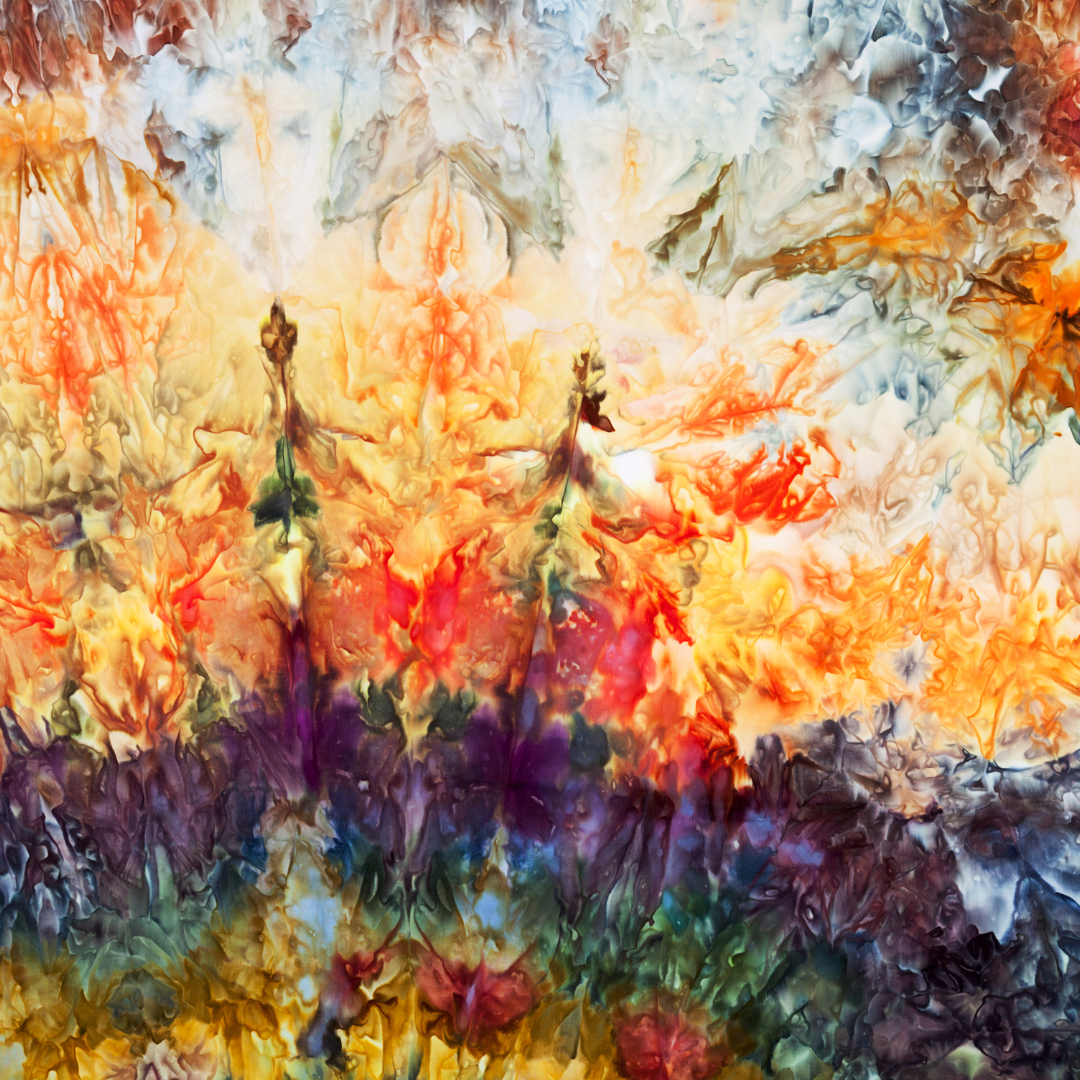
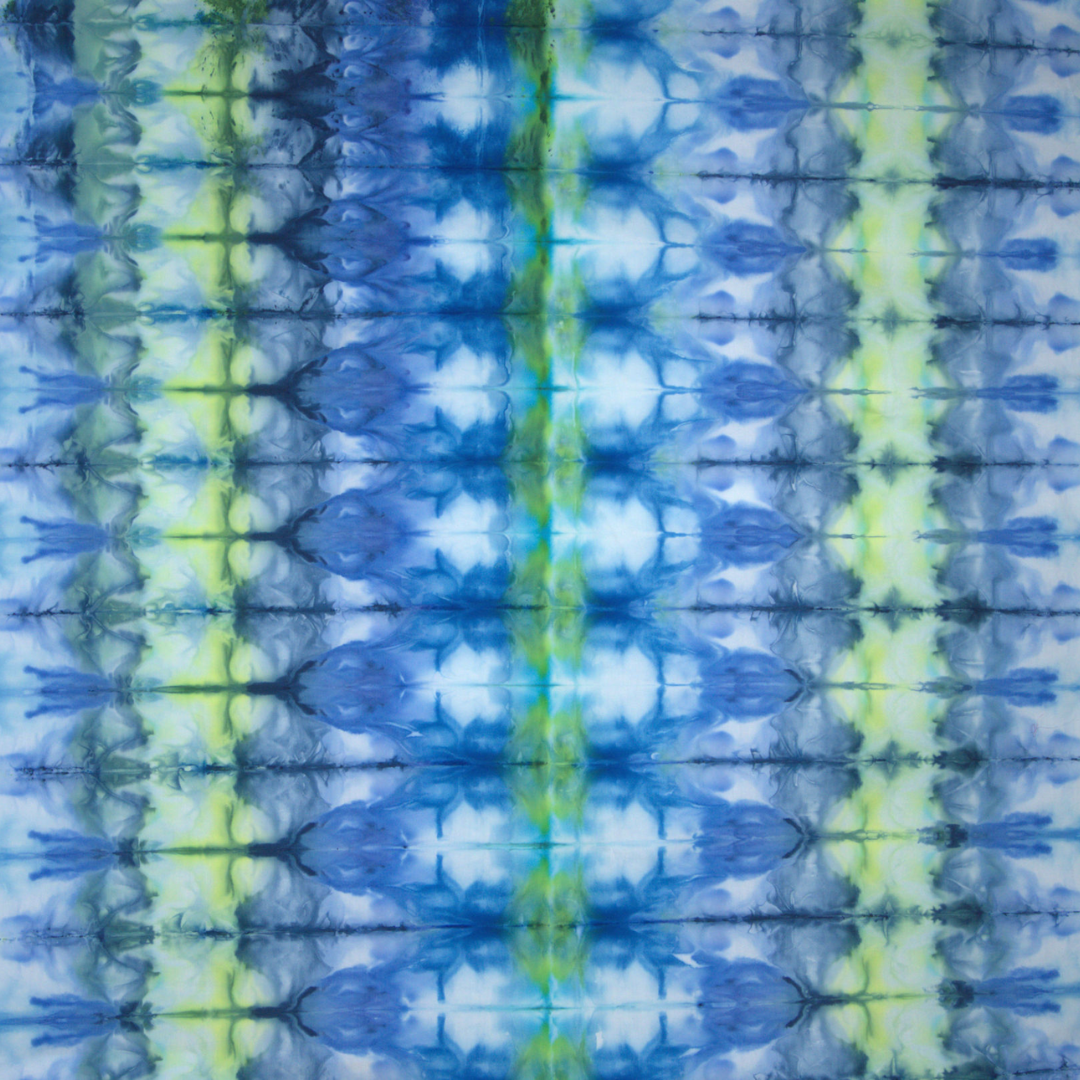
Ice-dyeing fabrics is a unique and gorgeously modern technique that I know you will come to love just as much as I have. Especially when you see how it creates the most mesmerising watercolour impressions on your fabrics, that burst with beautifully contrasting colours in the most extraordinary way.
You’ll absolutely obsess over it. Trust me!
Let’s talk about ice ice (dyeing) baby!
From flowers to vegetables, leaves and bark, it’s almost unsurprising that Earth has given us yet another natural dye component for us to add to our creative palette. This time around it is one of the Land’s most precious natural resources: water.
Well, frozen water anyway.
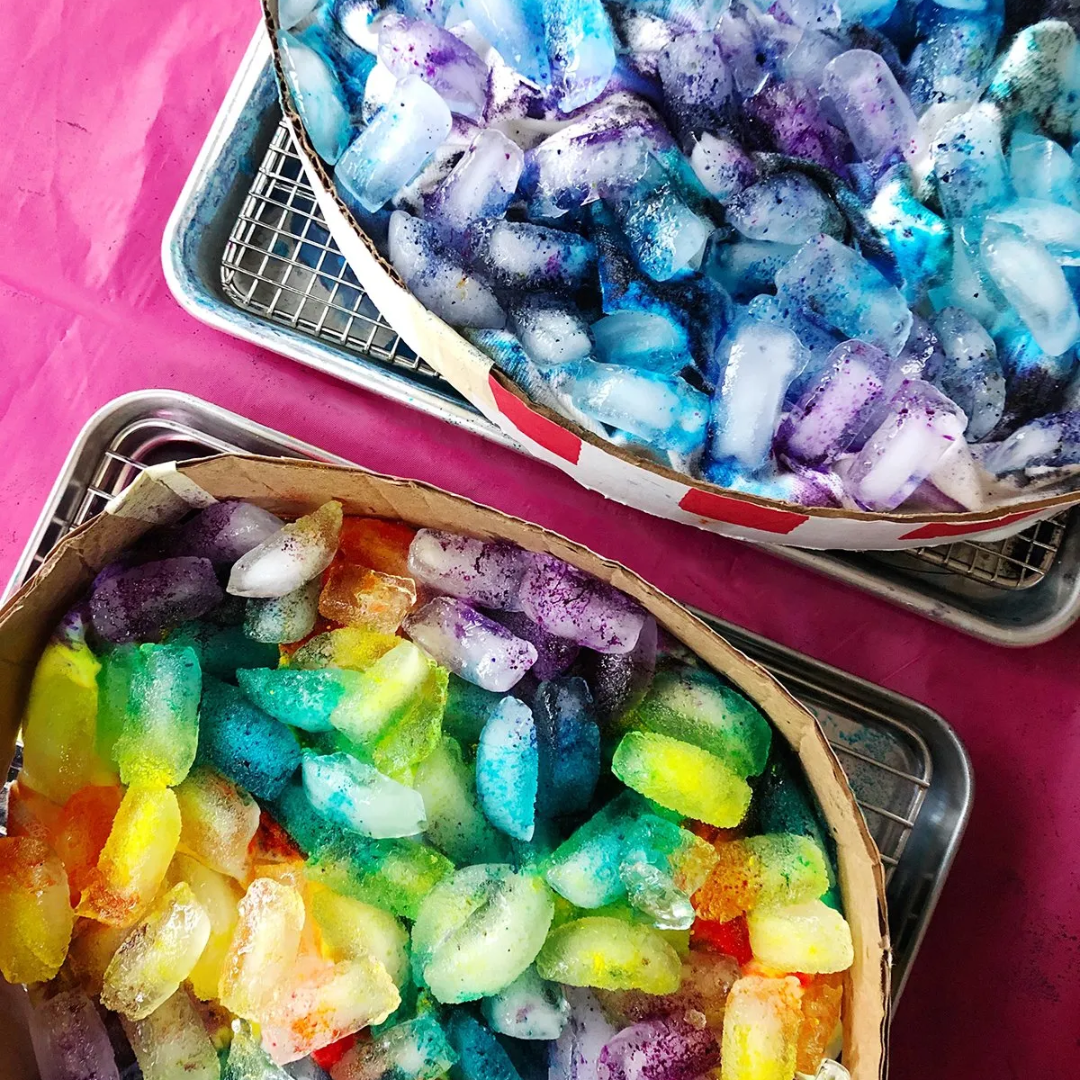
Ice-dyeing fabrics is a calming handcraft that involves gently placing natural dyestuff onto your fabric and then placing blocks of ice on top of the dye.
Now, I know that this process is incredibly unique (some may even say strange) – but it’s important that you trust the process. All it takes is a few moments before you begin to notice how the ice slowly melts and begins to deposit your natural dye randomly throughout the valleys and ridges of your fabric.
Remember that natural dyeing is a kind and gentle art form – not only on the planet but on you too. So don’t worry about your level of natural dyeing experience here. Ice-dyeing your fabrics is not only a simple process but a gentle reminder that our greatest creations come from moments when we relinquish control and let Nature run its course.
3 tips to master your ice-dyeing technique
1. Prepare your fabrics before you start
You can use any kind of fabric, but silk will work especially well for this technique! Before you can begin placing your ice blocks onto your material, it is essential that you prepare your fabric beforehand. You can start by gently washing it in a mild, pH-neutral detergent. I also always highly recommend you mordant your fabric. By doing this, you are ensuring even coverage of your dye and a brighter, more colourfast design.
2. Prepare your materials
You can use dye plants, frozen dyebaths or natural dye extracts for ice dyeing. You could also use a combination of all three of them! If you’re going to use frozen dyebaths, first create your dyebath by following step 3 of this method. Once it has cooled down, pour it into ice cube trays and pop them in your freezer to create your coloured ice cubes!
If you plan on using natural dye extracts (basically natural dyes in powdered form), you can get them from many of the natural dye suppliers in this list.
You also need to pay special attention to the colour of your fabric too. I prefer to use white fabrics as they are the best blank canvases, but should you choose a different more neutral muted fabric, be mindful that its colour will influence the overall look of your dye.
3. Don’t skimp on the ice
It goes without saying that ice is one of the key components of your ice-dyeing journey, so you want to make sure that you have enough from the beginning. After all, it is the ice that ends up creating all of your unique patterns and variations!
Keep in mind that the more ice you use, the more movement you will get. That means greater variation and more fun, unpredictable pattern designs that come to life!
Ice-dyeing fabrics: A step-by-step guide to dyeing with flowers and ice
- Before you begin, place your damp fabric (that you plan on ice-dyeing) into a bucket or shallow dish to ensure that you catch any runoff from the dye and ice.
- Gently sprinkle layers of frozen flowers and/or natural dye extracts onto your fabric.
- Randomly place ice blocks onto your dyestuff. Covering most of the surface area.
- Sprinkle colour modifiers (either lemon juice or iron solution) on top of the ice to expand your colour palette. Just remember that iron especially is quite strong, so use it sparingly!
- Wait for the ice to melt and create the most extraordinary watercolour effects.
- Once the ice has melted, steam your fabric in a colander over simmering water for 45 minutes. This helps the dyes set into your material.
- Then rinse and place your fabric in a shady space (out of direct sunlight) to dry and voilà – magic!
The most popular (and easy to do) ice-dyeing patterns
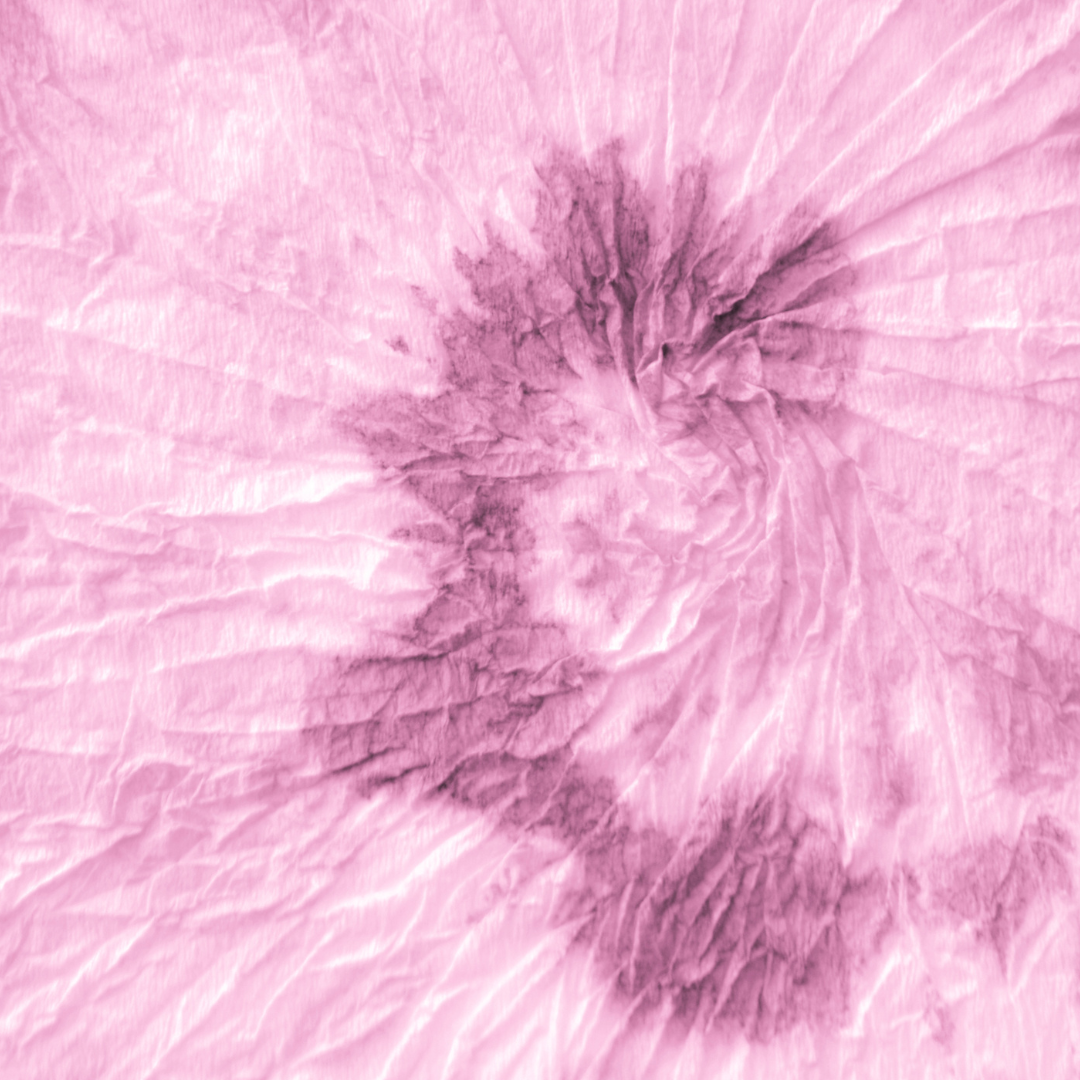
Crumple
To achieve this unique design, you will need to lay your damp fabric on a flat surface. Starting from the middle, you will slowly begin to bunch the fabric together and place a rubber band or string to keep it in place.
The result is the most eye-catching pattern!
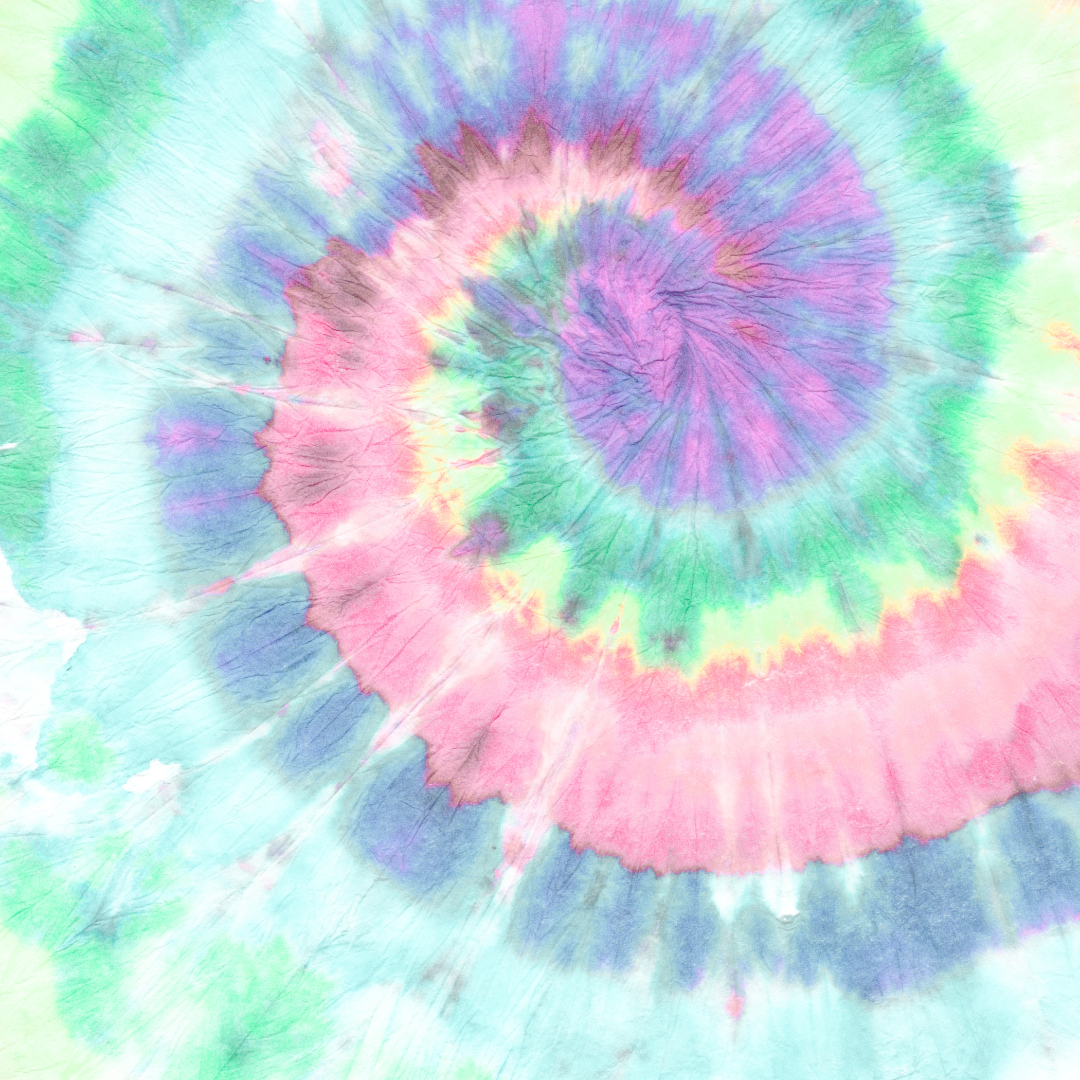
Spiral
No need to spiral because this design is super easy to do (sorry, couldn’t miss that opportunity to use that pun). Slowly begin to twist the fabric in a clockwise direction until a spiral begins to form.
You can use your non-dominant hand to hold the spiral down as you twist to ensure that it doesn’t begin towering – you want it to remain flat! Then keep the shape in place with a few rubber bands or pieces of string!
The result is a stunning, almost psychedelic aesthetic!
Fan fold
As the name suggests, this design requires that you begin gently folding your fabric back and forth so that it almost looks like a fan or accordion.
The result is a colourful, wholesome, fan-like appeal!
What is the difference between ice-dyeing fabrics and tie-dyeing fabrics?
When I first introduce people to the ice-dyeing technique, it is oftentimes followed with this exact question. Understanding the differences between tie-dye and ice-dye means that you will not only be able to learn two different textile techniques but also discover which one you prefer.
And so, to keep it simple, the process of tie-dyeing means that you are placing rubber bands or strings in various ways to create gorgeous patterns.
Whereas with ice-dyeing your melting ice blocks actually create your unique designs and patterns.
The beauty of naturally dyeing fabrics is that you get to see the whole life cycle of your artwork
From fast food to fast fashion, life in the fast lane has become the new norm. But I am here to tell you that the secret to a happy, meditative and fulfilling life lies in stillness, and an intentional slowness.
So much beauty resides in experiencing the entire lifecycle – of your own life and that of our art forms.
And so, if you would like to not only engage with like-minded people but discover even more about the slow and calming lifecycle of natural dyeing, I encourage you to sign up for my online natural dyeing workshop.
Now, onward to creating and embracing! I can’t wait to share this space with you.


